When I moved to the United States, I got my first introduction to the National Parks System with an amazing trip to Yosemite National Park.

A friend hooked me up with a Passport to collect stamps of all the parks I visited. Over the next few years, I collected a bunch–Yosemite, Death Valley, the Golden Gate in San Francisco, even the Grand Canyon!
Recently, I was looking for my parks passport, but I couldn't find it anywhere. I moved several times in the last few years, and must have lost it along the way. This made me want to build an app that could act as a "digital passport".
Project Overview
For the phase 2 final project, I built "Digital Parks Passport" using React and React Router, with data from the National Park Service's publicly-available API.
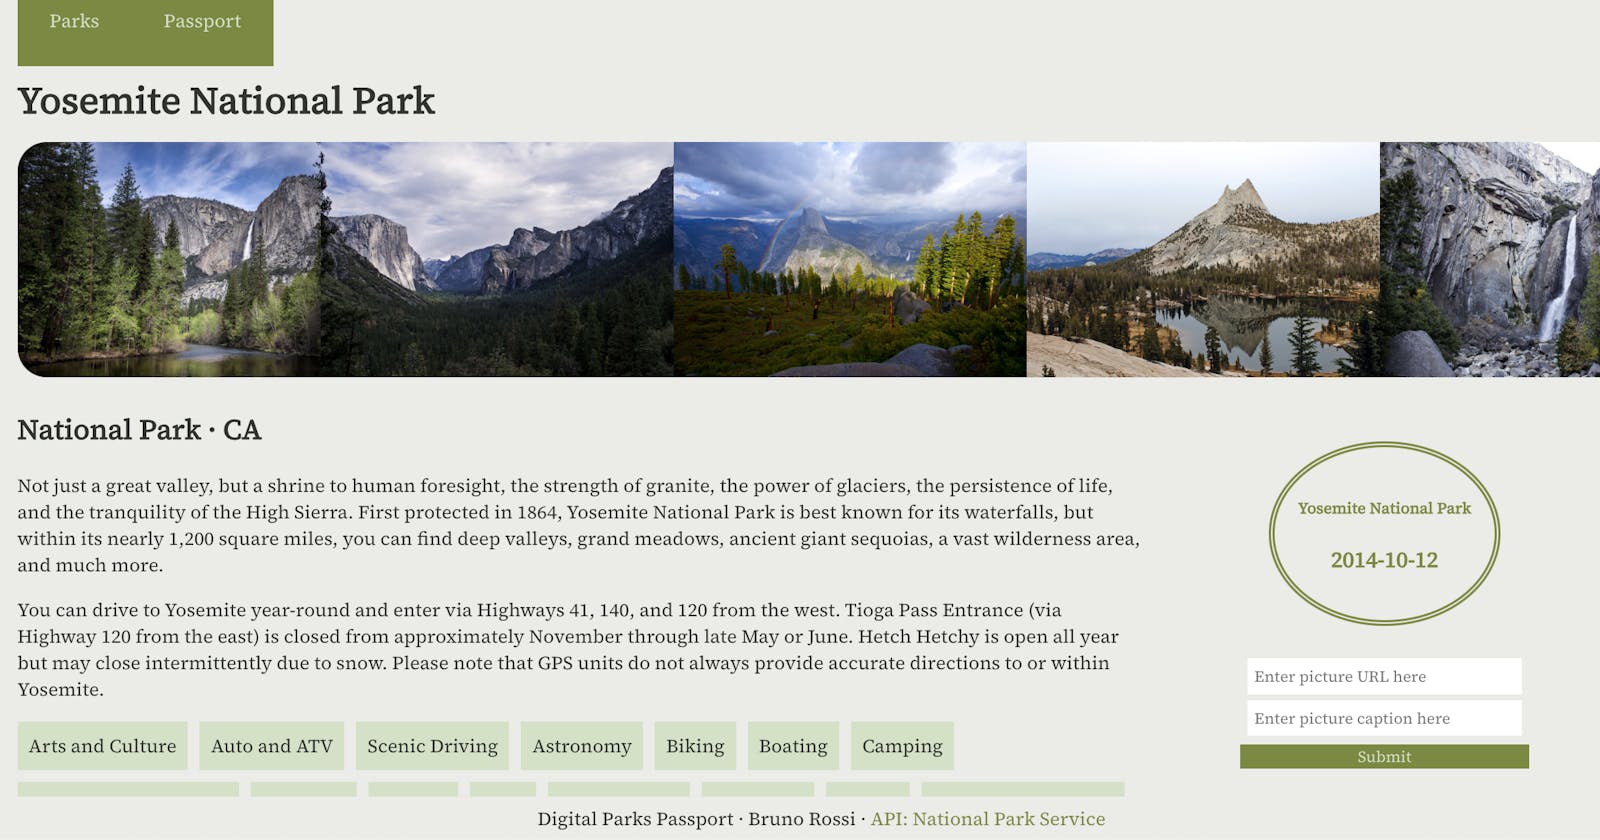
Here's a look at the finished product:

Here are the basic user stories I wrote for the MVP:
As a user, when I load the home page, I can see a list of parks.
As a user, I can search for a park by name.
As a user, when I click on a park, I'm shown a page with full details about the park: the park name, description, designation, state(s) where it's located, directions to the park, list of activities available at the park, and an image gallery.
As a user, I can submit a form to add a stamp with the park name and date of visit. The stamp is immediately displayed on the park page, and I can view all my stamps on the Passport page.
As a user, I can add my own personal images to the gallery.
Besides using React and React Router, this project allowed me to get a lot of hands-on experience using Flexbox and other React hooks!
Challenges
The most difficult feature to implement was getting the image gallery to display as a horizontally-scrollable bar. Although the solution may seem very simple using CSS, it required me to really think about how Flexbox works.
To achieve this, I used the following code:
// Images.js component:

import React from "react";
import { useState } from "react";
import "./Images.css";

function Images({pictures}) {
    console.log(pictures);
    return (
        <div>
            {pictures.length < 1 ? null : <div id="gallery">{pictures.map(picture => <img key={picture.caption} className="picture" src={picture.url} alt={picture.caption} />)}</div>}
        </div>
    )
}

export default Images;
In the Images.js component file, I'm using a ternary expression to check the pictures array's length (so we only display the gallery if there are images to show). This is because some of the parks in the API don't have any images.
If there are pictures to display, then we map their urls as the src value of img tags inside of the "gallery" div.
The real trick, though, comes in the form of CSS using Flexbox:
#gallery {
   display: flex;
   flex-direction: row;

/* Set the width to 100% of the parent*/
   width: 100%;

/* Define how to handle the overflow content */
   overflow: auto;
   height: 200px;
   border-radius: 25px;
   margin-bottom: 2%;
 }

/* Hide the scrollbar */
 #gallery::-webkit-scrollbar {
   display: none;
 }

.picture {
   height: 200px;
}
In the CSS code above, we're setting the gallery height value to 200px. This causes flexbox to place each of the images in a row horizontally, but only on one line. We also set the picture height to 200px, that way it will always take the full space.
Since the width of the gallery is 100% of the page, any overflow images are placed on the row horizontally, so the browser makes it scrollable. Then, we use :-webkit-scrollbar display:none to hide the scroll bar for a cooler look.
Future iterations
This project has a lot of potential for future iterations. Below are the stories I didn't get to implement due to the limited time available (only 4 days):
As a user, I can search for parks by activity/designation in addition to park name.
As a user, when I load the page, I see the list of parks paginated instead of all 470 at once.
As a user, I can see an error page.
As a user, I can upload image files from my computer (currently can only use URLs).
Conclusion
This project allowed me to get a lot of hands-on practice with many hooks available in React: useState, useEffect, Outlet, useParams.
There are many more hooks to learn in React, but having practiced the basics, I feel more empowered to keep learning about more complex hooks and features of React.
Thanks for reading!
Sources
National Park Service API Documentation
"Adaptive Photo Layout with Flexbox" by Tim Van Damme
"How to create horizontally scrollable sections with Flexbox" by Ohans Emanuel.
